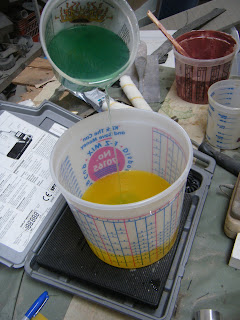
A few more pieces of foam got formed with the help of some custom foam forming tools, and yeah nobody seems to sell them... Hopefully this weekend we can finish this set of foam and prep the mould for early next week. Thanks for reading and don't forget to follow us!
Saturday, March 31, 2012
1 Down, Three More to Go!
Friday, March 30, 2012
The Next Boat
We finally got my boat going. We employed a different method of construction on this part. The first major difference was the use of Corecell foam, thermally formed as previously documented. The skins were cut into 50 inch pieces and wet outside the mould. By doing so we precisely regulated the amount of resin in our carbon and ensured proper alignment of the fibers themselves. The pieces were laid into the mould overlapped. Part two was aligning the foam onto the laminate. We scored the foam in a few places to ensure it would pull down, but found it was much easier than expected. The foam we used was perforated, negating a need for release film. The holes controlled the flow of resin, keeping the distribution even and ensuring we couldn't draw too much out. We waited the 4 hours 30 minutes recommended before pulling vacuum and were able to get a strong bag, 26inHg at the opposite end, which pulled down any problem spots in the foam. Sorry for the lack of photos on this part but I will record the next part.
The next day reinforcements were applied. The ring frames were formed, then independently epoxied and bagged onto the core. Today we finished the part with the outer skin. The same methods were employed and the other side of the unis were put on ring frames. To simplify the bagging process the release film and breather cloth were glued together and went in as one part. Again we had some time to wait before pulling on the bag just past that 4 hour mark. Thanks to SP Gurit for helping us out with some excellent materials. Pictures coming soon of the part out of the mould. Thanks for reading and make sure to follow us!
Release film
film and breather together
carbon measured out
mixing resin
squeegeeing the resin to ensure proper distribution
ready for the bag, running the tape
This past week we have been working on the plug for the beams. It was constructed out of 5 layers of particle board that was run through a planer to make it exactly 3.5 inches. The plug was then rounded by sanding and using a custom circular cut squeegee to fill in any low spots to make the beam round. Then there were ends added that will dive under the deck. The top of the front beam will sit flush with the deck and the bottom of the rear beam will be flush with the deck, exposing the knuckle of the beam. Lastly, the jig to line up the hulls was assembled and my hulls were put into it, which made it look close to completion. Keep following for more updates
Trimmed flange
A-cat in jig
Beam plug
Knuckle of beam plug, the corner will show on the rear beam.
Trimmed flange
A-cat in jig
Saturday, March 17, 2012
3/17
Today was a productive day. On Jeremy's boat the bulkheads were fabricated. To do this templates were created to fit inside the ring frames and were then used to cut out bulkheads from a carbon-foam panel. The process of actually fitting the bulkheads was quite labor intensive. Afterwards, a flange was put around the bulkhead to provide a greater bonding surface to the hull. For my boat the oven was finished up, and we began to form our core material. Hopefully that will be finished in the next few days to be able to lay up a part. Stay tuned for updates.
fitting the bulkheads
forming the foam, out of the oven then under pressure
foam going in the oven, heated to 240 degrees
both bulkheads in the part, beginning to come together!
Monday, March 12, 2012
Olympic Training Center
Wednesday, March 7, 2012
Progress Update
Today we had our first two parts out of the mould to check them out and our joining system was trimmed down to size. We then taped the halves together and it looked great. Also today our materials came in from SP Gurit for the next boat. An alternative construction is planned, we will be using M Series CoreCell foam and SP ampreg 22 resin. The core is in plain sheets so we will be thermo-forming it to the part. Construction for this and the other hull of Jeremy's boat is planned for this weekend and the following week. A special thanks to SP Gurit for supporting us. Thanks for following and stay tuned for updates soon!
Foam sample, formed easily with the heat gun.
It's here!
Very light, great to see it all together.
Foam sample, formed easily with the heat gun.
It's here!
Very light, great to see it all together.
Sunday, March 4, 2012
Day 4
13 lbs, 15oz! Today an outer port hull was built and the inner port hull was pulled from the mould. The outer port hull today was a more labor intensive undertaking. Illustrated by the pictures, it can be seen that more complex reinforcements were applied to the outside. They were placed from beam to beam to reinforce standing position while trapezeing, and for the chain plates. Also the same as all the other parts, the forestays and beams were strengthened via rings frames. MAS epoxies were a pleasure to work with; the ability to control the cure time is great. Thanks to Harry Fendt for the photography and thanks for following the project, stay tuned for more updates!
wetting the outer skin
precoating foam with resin
core into the boat
Subscribe to:
Posts (Atom)